1938 Packard Coupe Roadster’s Amazing Restoration
By Travis and Jason from LaVine Restorations
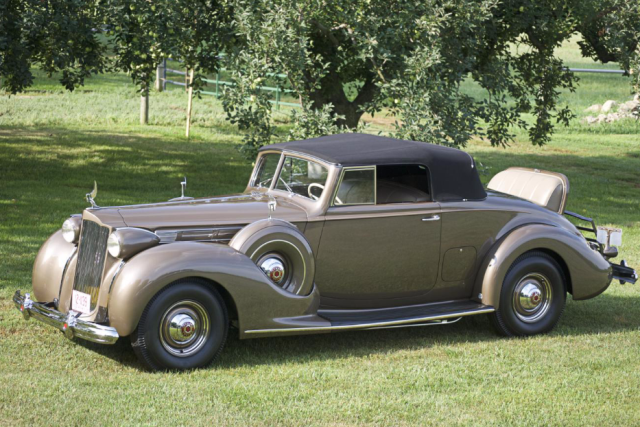
This blog is written from the perspective of two young (32) former attorneys working under the master mechanics and craftsmen at LaVine Restorations. Thankfully one of us (Travis) grew up around these cars, and the other (Jason) helped run one of LaVine Restorations operations prior to law school. However, we may not have fully appreciated how intense and intricate the process is. The amount of time, energy, planning, research (and research and research), artistry, craftsmanship, and skill that goes into one of these cars is something that most people truly don’t understand. These cars are pieces of American history and are testaments to American ingenuity, automotive engineering, design, and art. With that preface, allow us to introduce the 1938 Packard Model 1607-1139, or better known as a 12 Cylinder Coupe Roadster.
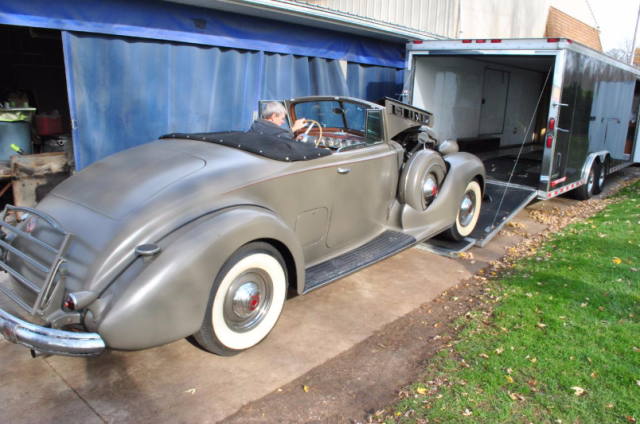
Featuring a 134 wheelbase, the drop-top two-seater is just slightly bigger than its modern counterparts. Only slightly. The massive 473 cubic inch V-12 engine produced 175 horsepower and weighed in at roughly 5,255 pounds, give or take a couple hundred depending on options and lead. The car can seat four via the rumble seat, which I might add is very comfy. Even though the car had a power to weight ratio of .033, they were surprisingly fast. Our car was capable of driving 70 MPH to Big Sur while at the Pebble Beach Concours d’Elegance Road Tour. The car is also extremely well balanced – a finger can turn the wheel at minimal speed. The brakes were extremely good for their time as well. Overall, the car was and is an absolute joy to drive. However, I digress. The car arrived at the shop in November of 2014 looking good from afar, but being far from good. We have seen cars come in the shop in extremely great, original condition. We’ve had cars come in boxes. We’ve had everything in between.
LaVine Restorations, Inc. uses 303 Automotive Products in their shop to keep their cars looking their best. Get yours today!
Upon initial inspection, there were many glaring issues (at least from our perspective) and missing parts, and that was just the tip of the iceberg: missing lights, missing dash electronics, incorrect bumper and bumper braces, fender mounted antenna, extensive metal damage concealed by copious amounts of plastic filler, damaged body panels, poor fitting components, broken gauges, broken radio, wood damage, etc.
So essentially, this was a typical project here at LaVine Restorations. The best way to discuss the process of the car is probably to go by sections – metalwork, chassis, electrical, research, engine, body, paint, upholstery, final assembly:
Metalwork
Where to begin on metalwork…Metalwork and fabrication are always an interesting process on cars that have old, rusty, probably previously worked metal and patches. Add in the fact that some of these cars are extremely low production, and bam, break out the English wheel. This car, like nearly every car we have seen in the shop over the past 40 years, had its share of problems – there were many issues large and small. The easiest way to break down some of the issues is probably with a selection of before and after pictures. The side mount tire wells were in horrible condition and completely rusted out, as is typical of these cars considering that they become a bucket for water when drains are plugged shut and salt kicks up from tires directly on them. So, we had to repair the lower portions of these wells.
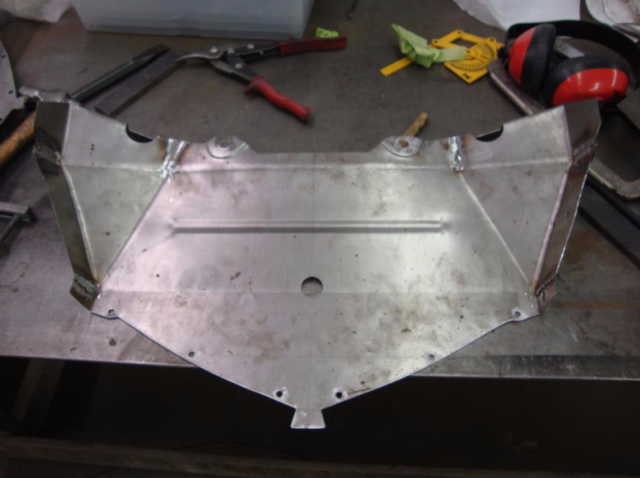
The radiator support splash pan was also a lost cause considering it looked like it was shot with a shotgun, so we had to build one from scratch. This is a component of the car that most people will never see, but which requires the utmost attention and detail to bring the car back to its original state.
The rocker panels required replacing too.
There were many, many more components that required metalwork. We pulled blueprints for various components to ensure correct fit, researched the parts books, studied factory photos all to make sure that the bones of this beauty were solid and complete.
Chassis
Luckily, the chassis under this car was in decent shape when it came to us, but it still needed a fair amount of work to ensure that the owner would be able to enjoy this car for years to come. Cosmetically, the chassis receives just as much attention as the body. It requires just as much research and, in many cases, copious amounts of correction from previous work done. Thus, the typical metalwork, fabrication, and research system applies. Mechanically, our standard procedure in a project like this is to install new bushings, bearings, and seals to ensure longevity—and this car was no exception. The control arms on the front suspension were completely rebuilt.
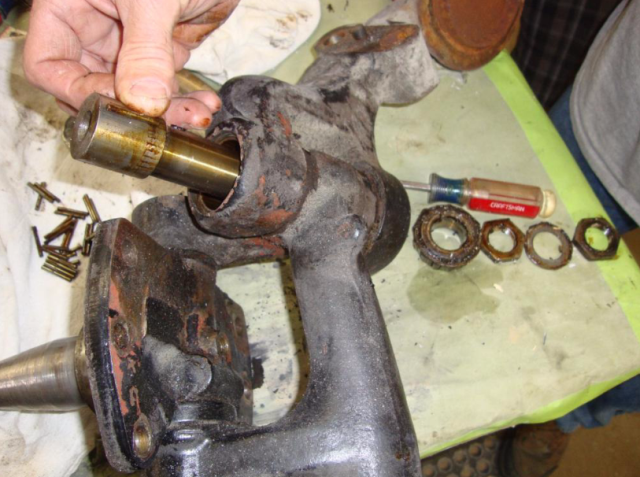
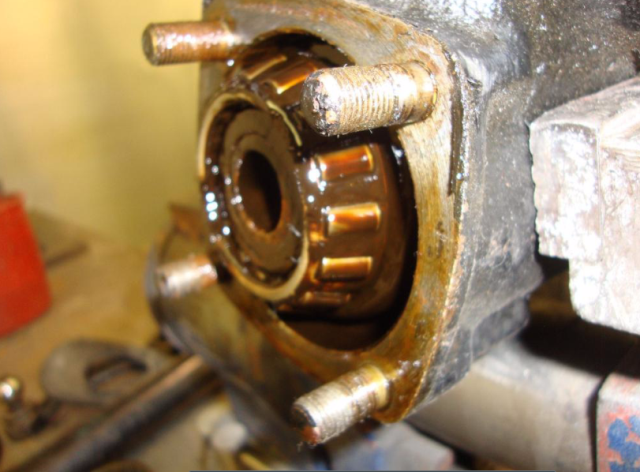
The rear axle bearings were replaced and so were the bearings in the clutch and brake pedal pivot. New suspension springs and metal spring covers were installed. The steering box was disassembled, inspected for worn components and had all new bearings installed.
To finish off the chassis restoration, a new exhaust system was installed, complete with a new resonator and muffler.
Electrical System
The electrical systems in any classic car are usually a collage of minor repairs and/or partial rewiring jobs done poorly, and the system in this car was patched together several times over the years. As such, components were added or removed, parts were missing, components were modified, etc. The instrument cluster/dash wiring in this car was probably the most challenging portion—it was a hodgepodge of new, plastic-covered wire and original cloth wiring that needed correction. So, we repainted the dash and gauges and removed all the plastic insulated wire and plastic fuse holders and replaced them with the factory correct cloth-covered wire and metal fuse holders.
Several controls were missing, which meant a parts research and gathering journey. It is amazing how detailed and difficult researching and sourcing components for these cars can be, especially when it comes to the little things. After hunting down missing controls and correct components, we were able to properly assemble the dash, which is truly a stunning piece.
Research
While this category falls midway in our list, research is ongoing at every stage. Coming from a legal, heavy research based background, we are amazed by the amount of research that goes into each and every one of these cars to ensure correctness and completeness. LaVine Restorations has always strived to be as thoroughly authentic as possible when bringing these beauties back to life. Eric and Vivian LaVine, the owners and founders of LaVine Restorations, hold a wealth of knowledge that spans decades, makes, and models. Marc LaVine, our head mechanic, also has forgotten more about these cars than I will likely learn in a lifetime. We also have an extensive research library at the shop – countless hours were spent in the Packard parts book. As such, we had a wonderful foundation of knowledge to begin with. There are also technical experts, such as the wonderful and extremely knowledgeable Brian Burke who provided great information and conversation along the way. As such, we leveraged our collective experience as well as the experience of others to ensure that this ‘38 was as complete as possible. In many ways, these cars are like a game of telephone – if we aren’t careful to be sure that these cars are as close to original as possible, the next generation could take these and believe what had been done along the way was correct and the cars could be completely distorted in time.
Engine
One of the most important aspects of a restoration is the engine. While you may not think it at first, these engines are truly engineering marvels – both functional and beautiful – so they must be treated with the same attention to detail that the other elements of the car demand. Thus, in addition to a total rebuild, all our engines are reworked to factory standards for color and finish.
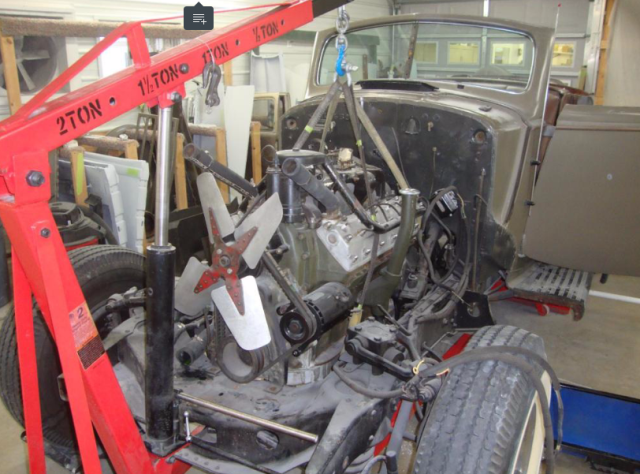
The first step is to remove the engine from the car and get it mounted on a cart so it can be moved easily and the smaller components can be removed and reworked.
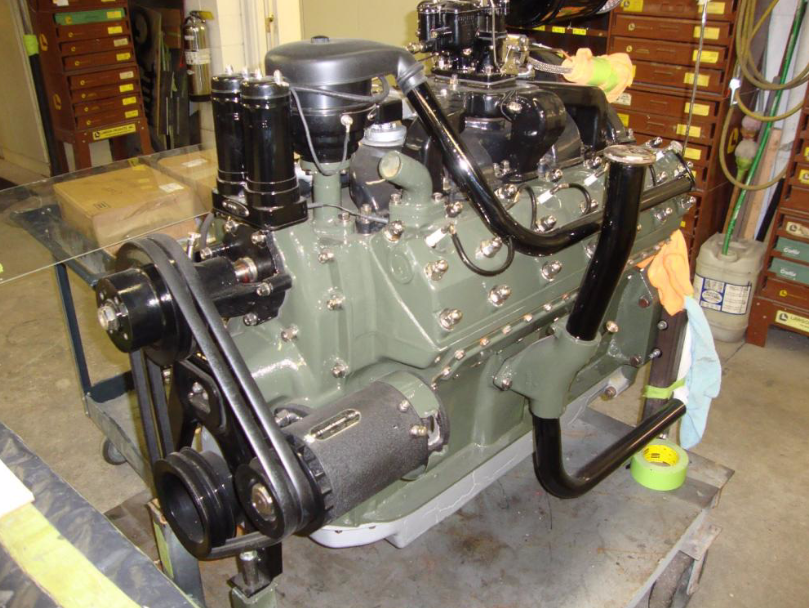
Usually, at least some of the porcelain components are in bad shape and need to have new porcelain applied. The exhaust downpipe on this car was in bad shape, so it was removed and recoated. Once everything has been reworked and painted or plated to factory specifications, the result is truly stunning:
Body
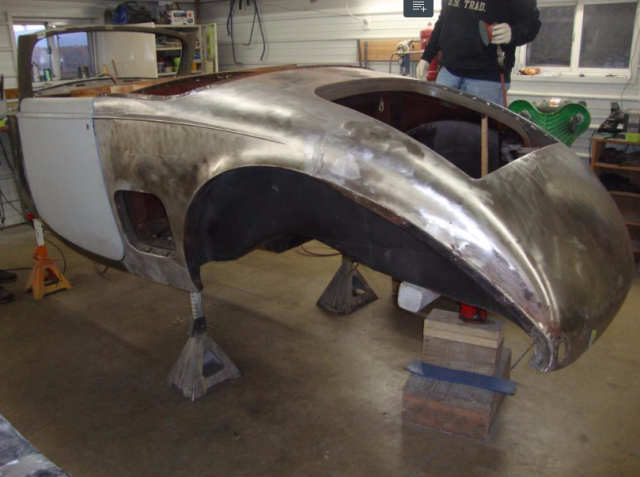
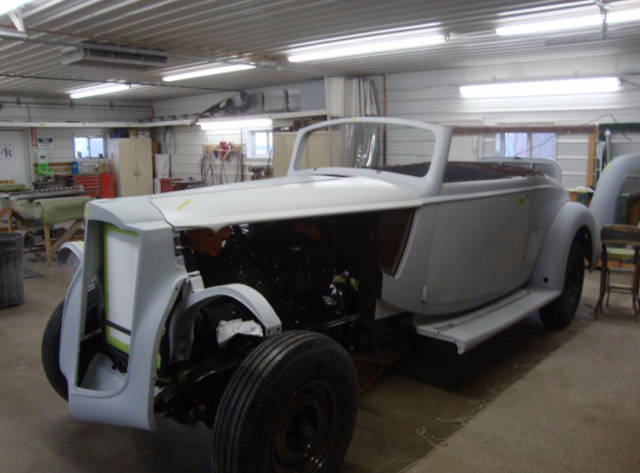
Ultimately, the body of the car is what catches your attention and what most will see on these classics. A wonderfully engineered and built engine and chassis are great but, if the body fits poorly, is wavy, or just plain looks bad, all of that work will be lost. The body and bodywork also happens to be the most time consuming aspect of a restoration, and rightfully so. Bodywork sets the foundation for paint, and our process is something that Eric, Vivian, and our shop foreman Brad Lawson have crafted and perfected over decades. As with all the cars we restore, to make this car show ready, we first removed the body from the frame and stripped down to the bare metal.
Every piece of the body is straightened and coated in epoxy-primer so that it can be fit back together.
Primer is sanded to a very high grit, all components are fit together to ensure proper fitment, and the paint process begins.
Paint
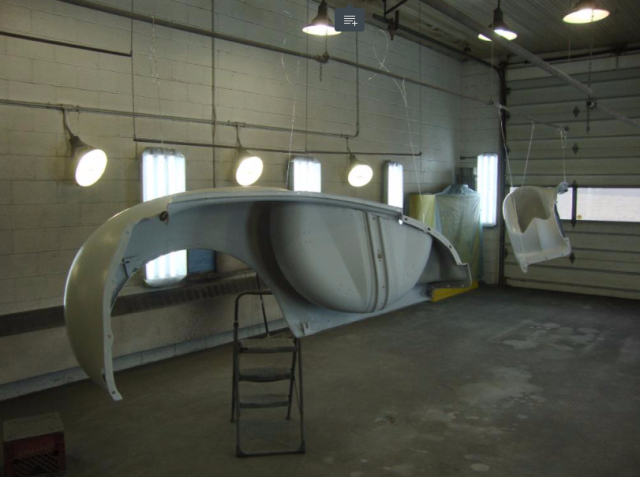
Paint will make or break a car. Eric LaVine is our head painter and has painted every car that has come out of this shop in the last 40 plus years – this includes Pebble Beach Best-in-Show cars, dozens of Pebble Beach Best-in-Class cars, Amelia Island award winners, Detroit Autorama Great 8 paint, and literally hundreds of other award winning cars. He, along with Vivian, have developed the paint process that we strictly adhere to. Keeping in line with authenticity, when cars have original factory colors that they would have come in we make our selections from these options. Again, research is key for this stage, as well as planning. With this car, we went with a Packard factory original color called Columbian Beige which turned out absolutely stunning. So, once the body has been test fit in primer, it’s time to make sure everything has been sanded and prepared for paint. Most of the smaller pieces are hung from a rack to better facilitate the painting process. The hanging approach also works for larger pieces, like these fenders:
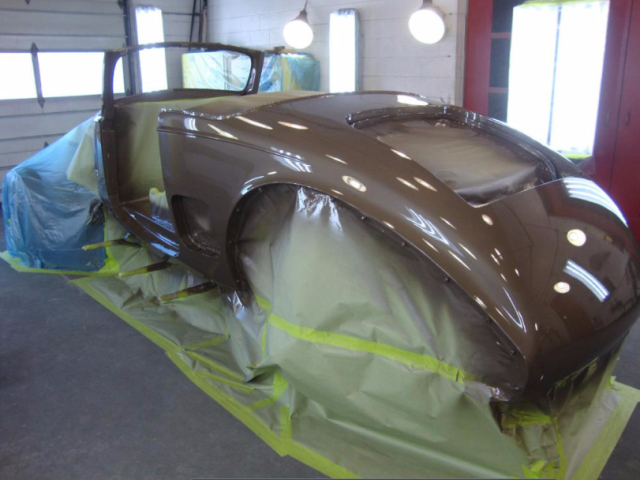
When it comes to the body, there is a lot of masking to be done to keep the paint where we want it. After all the hanging and masking is done, it’s time to spray some paint!
After all the hanging and masking is done, it’s time to spray some paint! Once paint is done, the car finally starts to come to life and takes on a character of its own. We are very careful with selecting colors to fit the wants and character of the owner, as well as what the car calls for. Upholstery is a large part of the process and must compliment the paint.
Upholstery
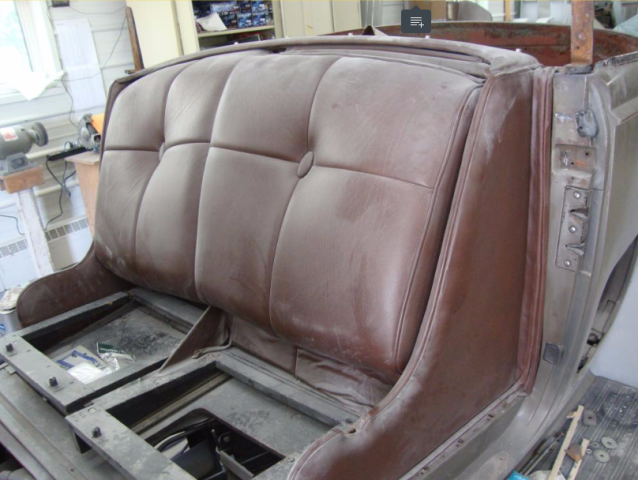
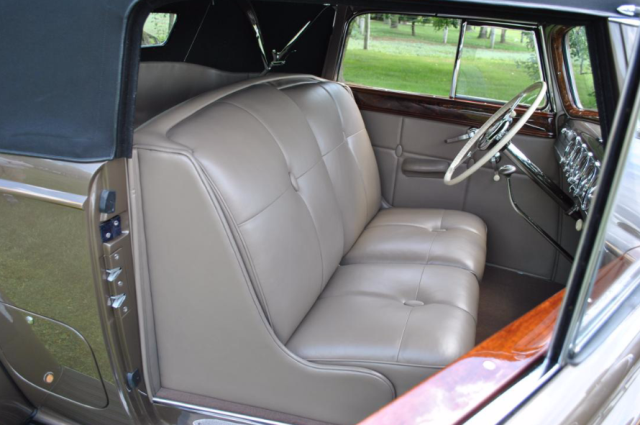
The upholstery and interior must compliment the body color, as well as retain authenticity. This means materials that are period-correct, correct stitch patterns, correct hardware, correct carpet material, correct convertible top material and construction, etc. After carefully researching our options, we selected a taupe-gray leather that took the interior from this:
To this:
The selection of a black top and black wall tires along with this interior color provided a stunning look that we were extremely happy with.
Keep your leather looking newer longer with 303 Automotive Leather 3-in-1 Complete Care!
Final Assembly
Once the car is painted, the fun (read: terrifying) process of assembling painted parts, fenders, doors, etc. begins en masse. The way the original designers and engineers put these cars together is an incredible, frustrating, and ultimately satisfying thing of beauty. Once complete, you have before you a work of art that had countless hours, blood, sweat, and tears (often literally) poured into it.
Pebble Beach
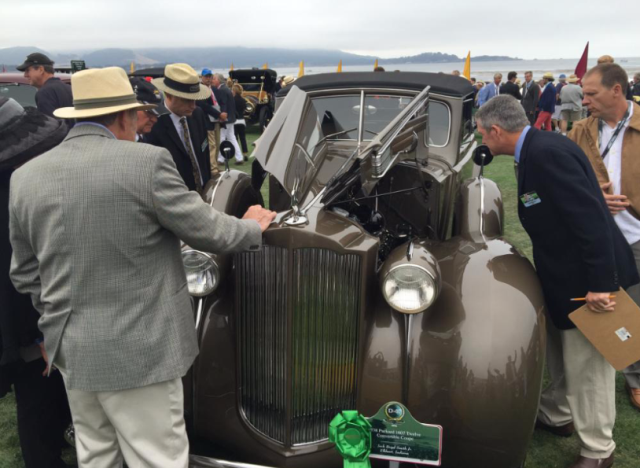
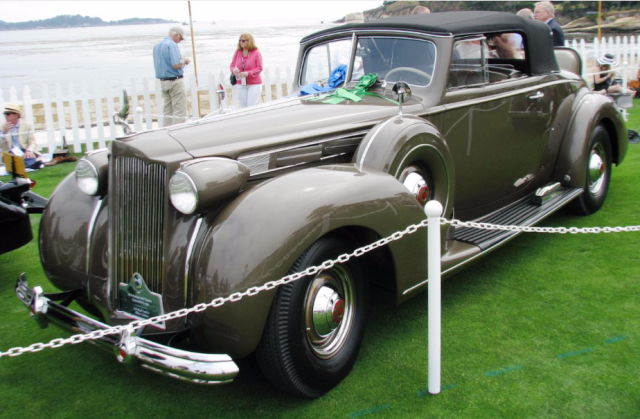
The first test of this restoration transpired on the 18th green of the famous Pebble Beach golf course at the 2016 Pebble Beach Concours d’Elegance. The world’s finest classic and antique cars gather at this show and competition is always extremely tough. The first part of the show consists of the tour, which puts these cars to task by driving anywhere between 80-100 miles around the Monterey area and along the coast. This is a stunning drive to spectate and participate in. The car ran like a dream, as it should have – we put no less than 500 miles on our cars before sending them off to be sure that everything is in top working order. The morning of the show, the cars roll on to the show field for all to see. From there, a last bit of detailing occurs and the wait for judging begins. The judges arrive and the car is inspected in every manner. Questions are asked, answers are provided, and excitement builds.
Once the car is judged, the top three cars in the class are selected and lined up side by side to await their placement. As the cars sit in a row, the first is called – Third-in-Class. Two cars remain, ours and another, and the next to leave is Second-in-Class. The next car is called, and it is not ours! At this moment our restoration is a Pebble Beach Concours d’Elegance Best-in-Class car! All at once, all of the planning, research, and hard work pays off. Such an honor and blessing. This was the first of hopefully many more awards and honors to come.
Next up is the prestigious Amelia Island Concours d’Elegance. We hope to return with another award, but in the high-stakes game of these amazing cars, you never know what may show up. Stay tuned for the results from Amelia and follow our Facebook page for more real-time updates from the show!


