How to Winterize a Camper Trailer or RV
 As fall comes and goes, many RV owners begin thinking about RV winterizing. For most people, it’s too cold outside to comfortably camp, so storing their vehicle is the best option. But simply parking the RV in a safe spot is not enough to ensure it will be ready to drive again once spring arrives. It’s important to prepare the RV for storage in the freezing temperatures that usually come with winter. Here’s how to winterize a camper trailer or RV:
Wash and Dry the RV
 Anyone who takes pride in their RV should wash it before storing it for the winter, since this way they’ll have a sparkling clean vehicle to look forward to. The first step in RV preventative maintenance is to wash not only the exterior surface of the RV, but also the tires, wheel wells, awningsOpens a new window and any nooks and crannies that may be hiding dirt.
Once the RV is clean, make sure to dry it off thoroughly. Even a small amount of moisture on the surface can cause corrosion over time, so drying it is a crucial step.
Prevent Pests from Coming in
Now that the outside of the vehicle is clean, it’s time to clean the interior. Start by removing all food from the RV so insects and rodents aren’t tempted to come in. Then wipe down counters and seats, followed by sweeping and mopping the floor to ensure no crumbs are left.
 It’s also good to open the doors to all cupboards, drawers and kitchen appliances to make sure there are no crumbs left inside. This especially goes for the refrigerator, which should be wiped down and then turned off for winter. Additionally, RV owners should check for any gaps or tiny holes in the vehicle, since insects and rodents may be able to get inside through those. Filling them with caulk should only take minutes and can help prevent an infestation in the RV.
Get Rid of the Water
One of the most important steps for winterizing a camper trailer or RV is to make sure there is no water left in it when it’s cold outside. Otherwise, it could freeze and wreak havoc on the RV. This is why it’s critical to remove the water from any tanks in the RVOpens a new window, including the water heater, fresh water tank and the gray and black tanks. Then, pour non-toxic RV camper antifreeze into the plumbing system to prevent the pipes from freezing.
If there’s an ice maker or washing machine in the RV, consulting the manual for those appliances is the best way to find out how to winterize them. And if the water heater uses electricity, turn it off before storing the RV.
Shut Down or Put Away Other RV Components
RVs are made up of numerous parts that need to be turned off for the winter. For example, take down any awnings, and shut gas tank valves. Check the roof for leaksOpens a new window and fix them as needed, and then change the oil before storing the RV.
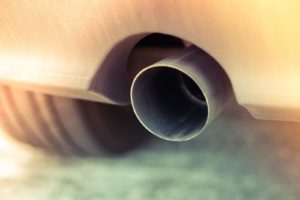
In addition, remove any batteries from the RV, since they often drain and become unusable after long periods of storage. Don’t store them with the RV. Instead, put them in a spot where the temperatures aren’t extreme. Finally, plug the RV’s tailpipe with steel wool or some rags to keep pests out.
Cover it up for Winter
 The final step to winterizing the RV is to cover it. Make sure it’s completely dry first or it could invite rust or corrosion. For the same reason, use a breathable fabric for the cover or a custom RV cover, not just a plastic tarp. Be sure to also cover the tires if the RV will be stored outside, since they need protection from the sunOpens a new window.
Following these tips can help prevent any damage to the RV over winter so it’s ready to start driving again when spring gets here!


